| Winter RVing Gives You the Place to Yourself! |
Check out my Winter RVing Tips here!
Just Jeff's RV Page"Going to the woods is going home, for I suppose we came from the woods originally." ~John Muir |
|
|
| Winter RVing Gives You the Place to Yourself! |
Check out my Winter RVing Tips here!


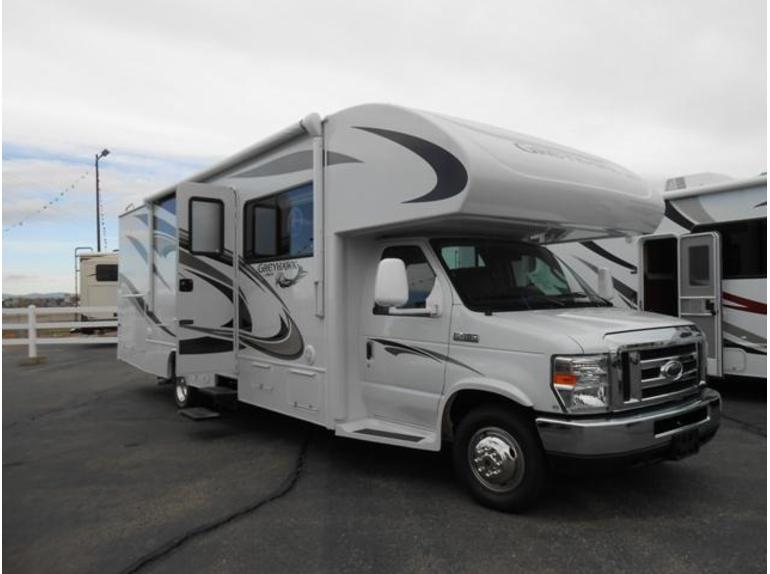
| 2013 Jayco Greyhawk 29KS Purchase | |
 |
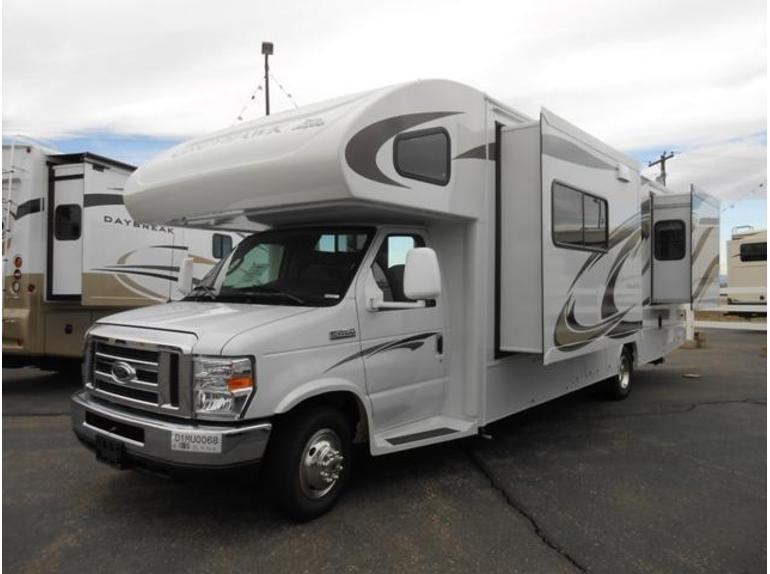 |
| We've been talking about buying our first RV for several years now, and watching prices now and then, and over Christmas break 2012 I saw a great deal on a 38' fifth wheel and Ram 3500 dually kit on craigslist. Both were in such great shape in the pictures that they looked too good to be true, so I said we'd probably buy it if they were actually that nice. Well, they really were actually that nice. I was ready to make an offer, but wanted to check out some Class C's just in case...and we ended up getting a great deal on a new C-Class Jayco Greyhawk from the dealer. December is their slowest month so it was a good time to buy. The only downside is that we ate the depreciation on this one whereas the previous owner had done that for us on the fifth wheel, but in the end we decided that we wanted the convenience of a C-Class over the space of the fifth wheel. We put down the deposit the day after Christmas, picked it up a couple days later, and left for our first trip the next day.
Living in Colorado, we decided to go south to avoid the weather...and ended up getting snow the first night (Las Vegas, NM) and driving through a white-out the second day towards Kirtland AFB in Albuquerque, NM. Day three brought us back towards home, and we stayed at Trinidad Lake State Park...it got down to single digits overnight - so we learned a few good lessons on that trip! I definitely gained a lot of confidence in its handling and comfort!
2013 Jayco Greyhawk 29KS Schematics:
|
|
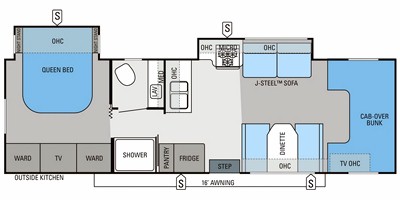 |
Floorplan for our 29KS model. |
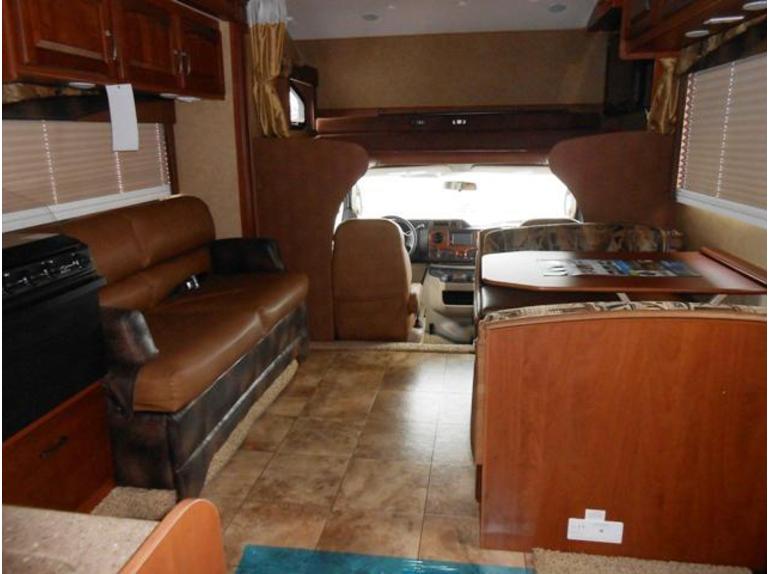 |
This picture is taken from beside the fridge, looking towards the cab, with the stove/sofa slide-out extended. For some perspective, we're about to buy a 4'x9.5' rug that will reach from the edge of the dinette to just under the sofa. Length-wise, the rug would reach from the carpet behind the cab to the sink cabinets (left foreground in this pic). When the slide-out is pulled in, the sofa will slide on top of the rug. That should help insulate the floor and stop some of the drafts that come in under the sofa. |
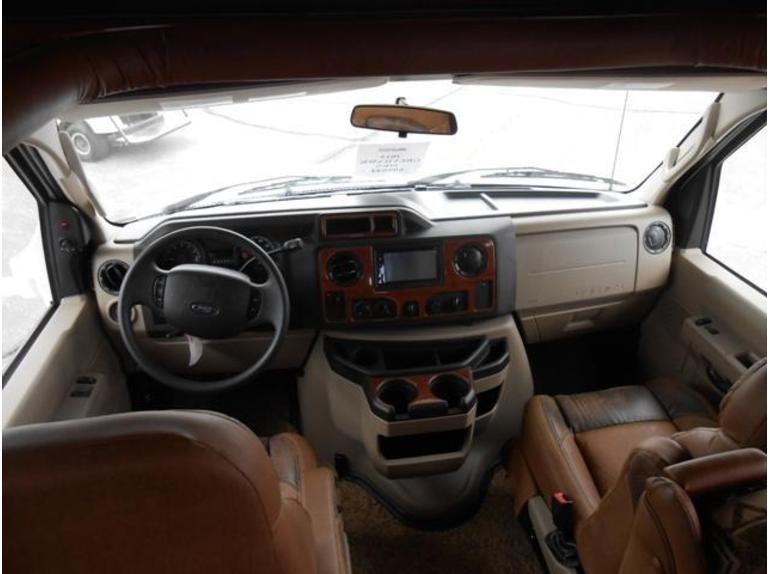 |
Very comfortable cab. Plenty of storage space in the doors and console. Only two critiques here...there's not much room for the passenger to get into the back because the seat is so close to the doghouse, and the 12v cigarette-style power outlet has been replaced by a single USB outlet. We normally use a double-USB charger in our cigarette lighters, so now we need to get a splitter to charge more than one device at a time. Actually, there are no 12v power outlets anywhere in the vehicle. |
 |
Here's a close-up of the cabover bunk. It's pretty comfortable if you like firm mattresses. In this pic, the mattresses are stacked up with the ladder on top and the TV is retracted. The mattresses pull out to make a queen-sized bed. The TV is on a motorized swing mount that swings it away from the wall so it's easier to see from the living space (sofa and dinette seats). If you watch from the dinette, though, the dinette's overhead cabinet can cover a bit of the TV's right side. We'll put a DVD player above the TV. The inverter powers this TV, but it's disabled while the engine is running to prevent stupid drivers from watching movies on the highway. |
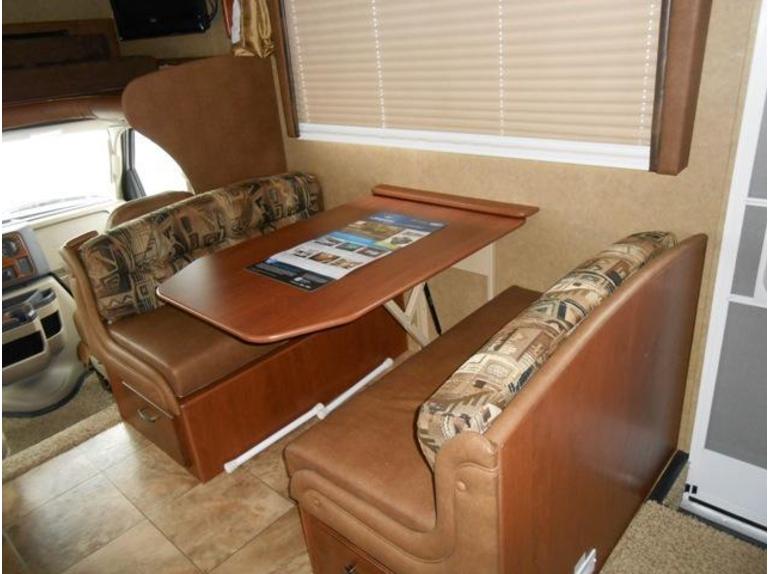
| The dinette table slides down to form a bed measuring 68"x42"...almost a full-sized bed, but it's a little short for my 13 year old. If the passenger seat is pushed all the way back, it actually leans into the dinette space. This also means that you can gain a few inches of length when sleeping if you push the passenger seat all the way forward. Takes about a minute to convert the dinette into a bed. |
 |
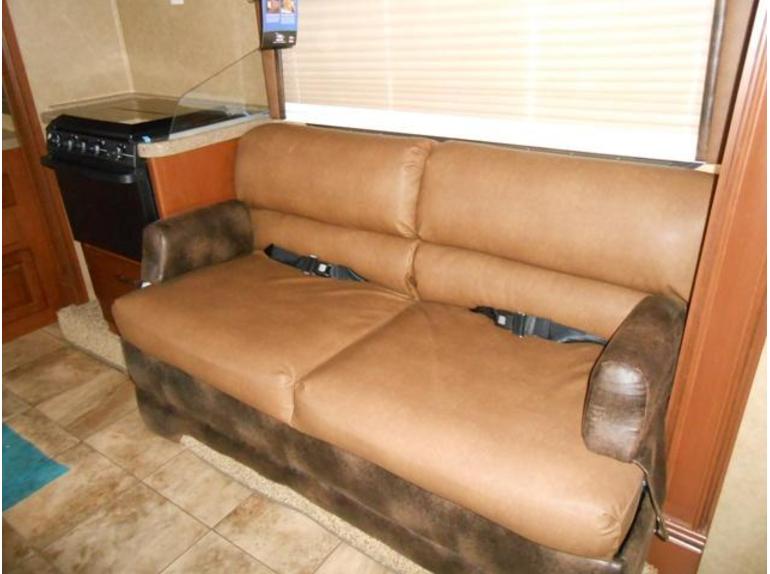 |
The sofa is pretty comfortable, and converting it to a bed is very simple...literally about 5 seconds. The sofa bed measures 61"x47"...again, not quite as big as a full bed. |
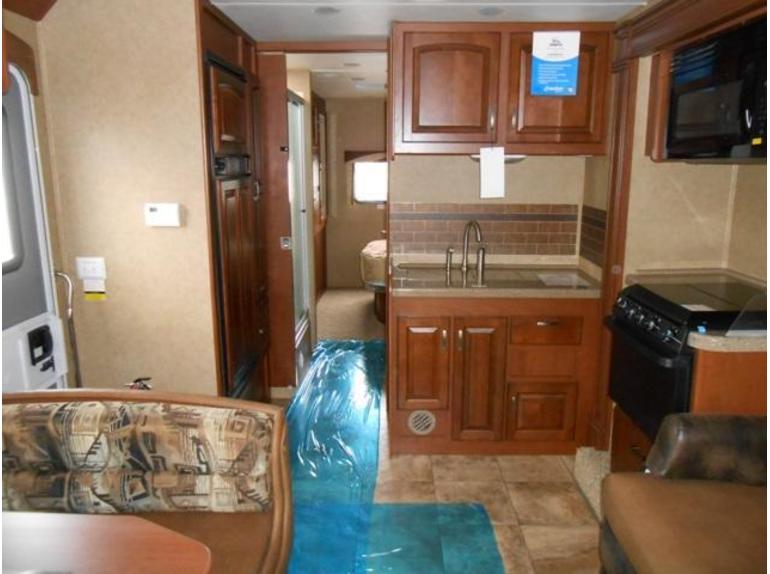 |
Standing near the cab and looking towards rear. You can see the door on the left with the fridge just aft of that, still in the kitchen area. A pocket door closes off the shower area from the living space, and the bathroom is on the right, just on the other side of the wall. It has a standard locking door. Just on the other side of the shower and bathroom is an accordion-style privacy curtain to close off the bedroom. |
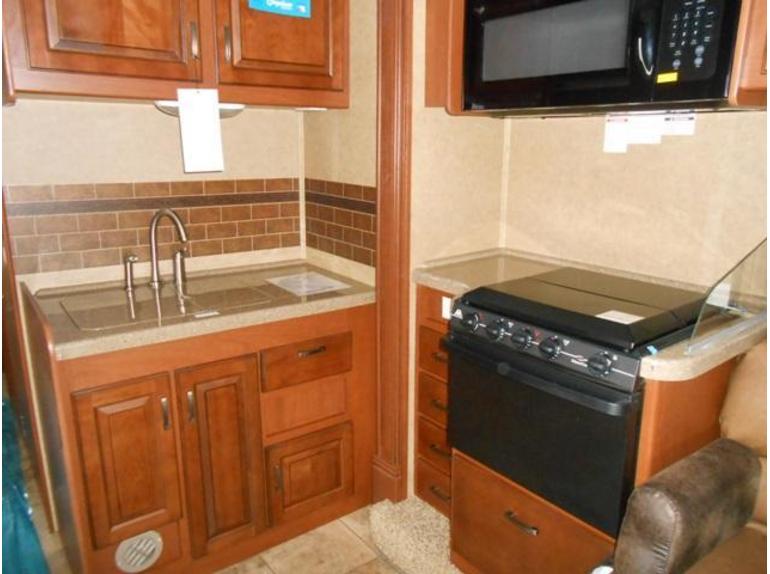
| Three-burner propane stove with a propane oven, and a microwave. The vent over the stove vents to the outside, which is great for limiting smells and humidity from cooking, but you can hear the vent flapping sometimes in windy weather. No big deal...I'd rather be able to manage the humidity, especially in winter. Learning to cook in this oven will take some practice; the first thing we made was blueberry muffins and the bottoms were burnt completely black while the middles and tops were perfect! Lots of RVers bring electric skillets and crockpots so they can use "free" campground electricity (b/c they're already paying for it) instead of expensive propane. We got a small crockpot for the RV but haven't really decided whether we'll use an electric skillet yet. The counterspace is a little limited, but that's what you get in a C-Class. The stove has a cover so we can use it as a counter when we're not cooking, and the coffee pot fits to the left of the stove. Glad we got a sprayer with the sink...makes doing dishes easier (even though we'll use paper plates a lot of the time). |
 |
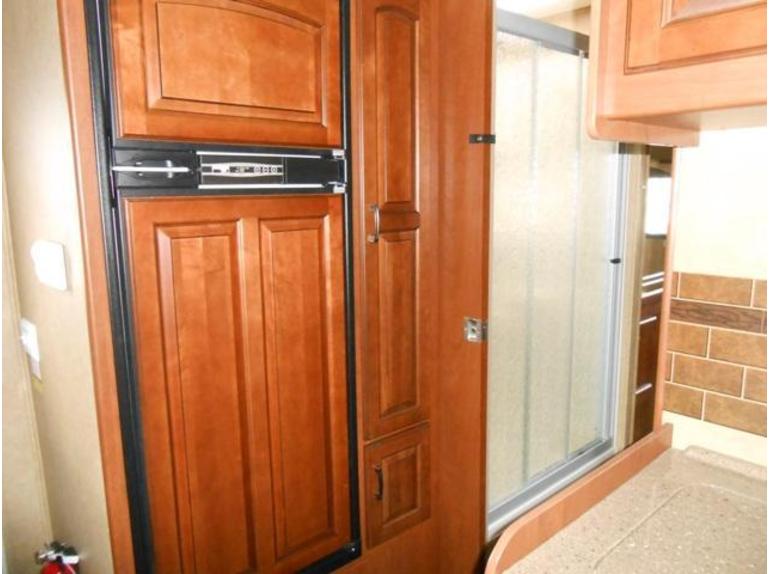 |
The fridge is LP and electric, and the pantry is just to the right. It's deep and narrow so we got rubbermaid containers to help with organization. The pocket door is between the fridge and shower. The shower has a skylight and a 12v light, but no vent. The bathroom right across the hall has a powered vent that should be enough to manage moisture when the pocket door and privacy curtain are closed. The shower head has an on-off switch on it, so military showers should help with moisture management, too. |
 |
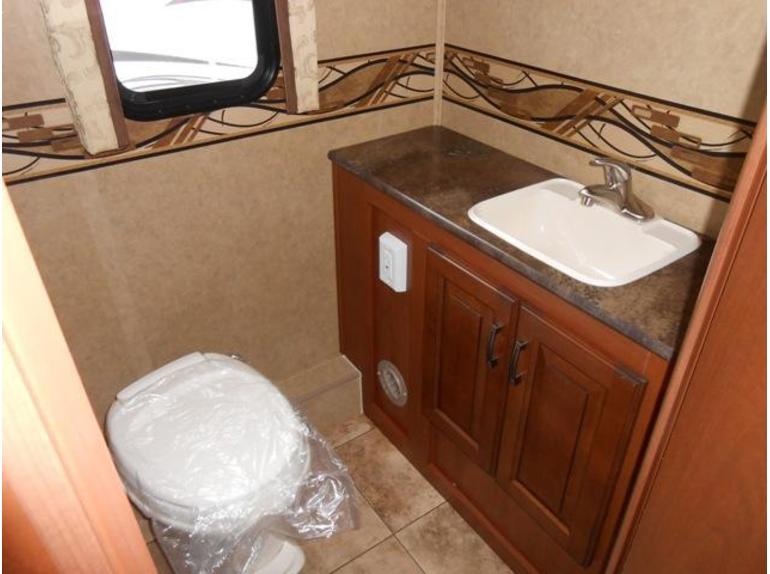 |
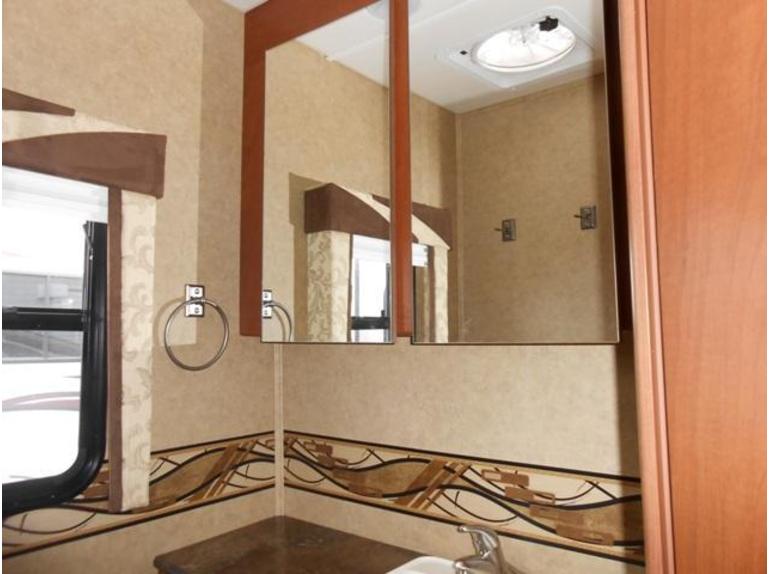
| Here's the bathroom with the mirrored medicine cabinet over the sink. The cabinet space under the counter to the left of the sink houses the main water inlets, and the valve control panel is just on the other side of the wall. There's a mess of hoses on the left side, but acceptable storage under the sink.
You can see the propane heater vent near the floor (electric heater vent is in the ceiling), and the power outlet on the left. There are several light switches, a water pump power switch and the tank heater switch to the right of the sink. |
|
 |
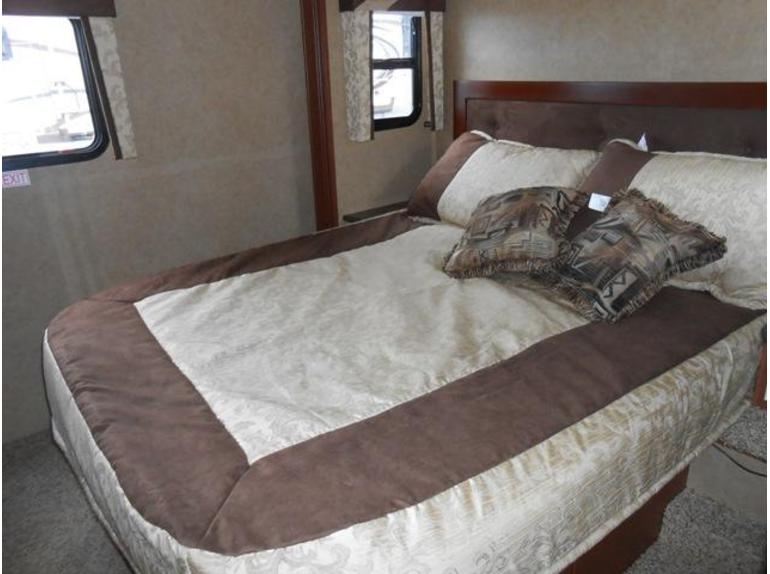 |
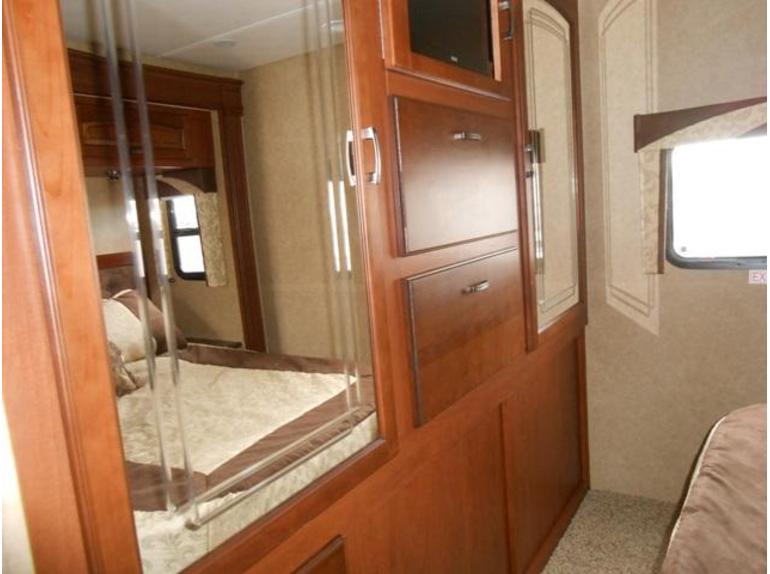
| The bedroom is in the rear, with the wardrobe on the left and the bed on the right. If you face the wardrobe, there are two drawers and a closet on the left, a TV and two drawers in the middle, and a closet on the right. The space along the bottom appears empty because the outdoor kitchen is on the other side.
Jayco doesn't appear to have put much thought into this part of the design; there are a few pecularities.
|
|
| Another picture of the bed to show the overhead storage, and another pic of the wardrobe to show the TV's positioning. When I move the TV to the middle, I'll probably turn that drawer into a cabinet where the door opens up towards the ceiling, just like what's over the bed. You can also see the FANtastic thermostat-controlled fan in the ceiling above the wardrobe...this should be great in the summer. For the winter, I put a piece of reflectix and a vent cushion in there to stop heat loss. |
|
| The bed lifts up for some storage underneath, but over half of it is systems...converter, fusebox, etc. The water lines actually run to the rear of the RV, under the bed and out the bottom, then back towards the front to get to the shower and outdoor kitchen. It's curious that the water pump is basically directly across from the shower but the lines take a detour through the bedroom! This also means the waterlines are completely exposed underneath the vehicle, so I plan to insulate them as well. |
|
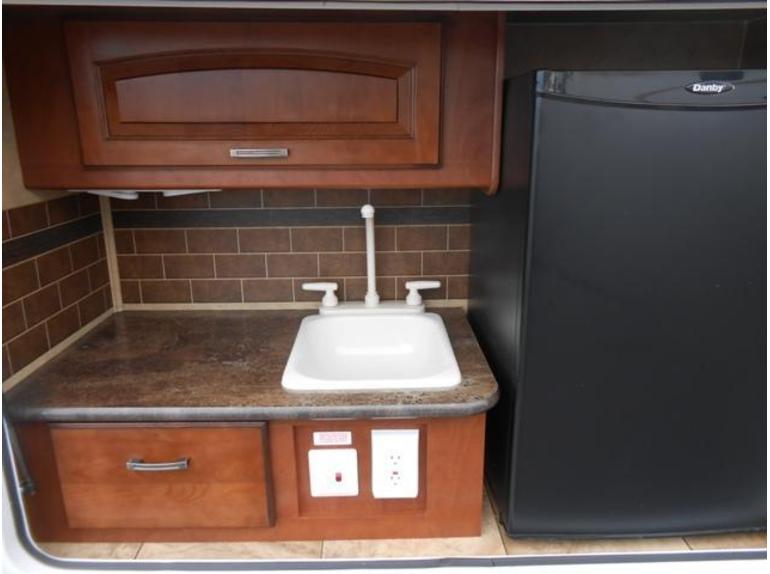 |
Here's the outdoor kitchen at the rear of the curb side. It looks like it'll be convenient during summer for cookouts, especially because there's a propane hookup just forward of this and the Greyhawk comes with a grill that attaches to the side of the RV. I'm not sure I want to cook right next to the RV, but I can at least use the propane hookup and move the grill a little farther away. There's not much outdoor storage in this model so I'll probably remove the fridge to open up more space for things I don't want to keep inside. As a side note, on that first trip in Trinidad Lake SP I dewinterized for everyone to take a shower and didn't winterize again quickly enough...so the lines outside the RV froze. The only damage was that this faucet broke. Lesson learned...I have plans for a small plumbing mod to help out with this. |
Top of Page | Site Map | Privacy Policy
© 2005 to Present | Email Me